 Save
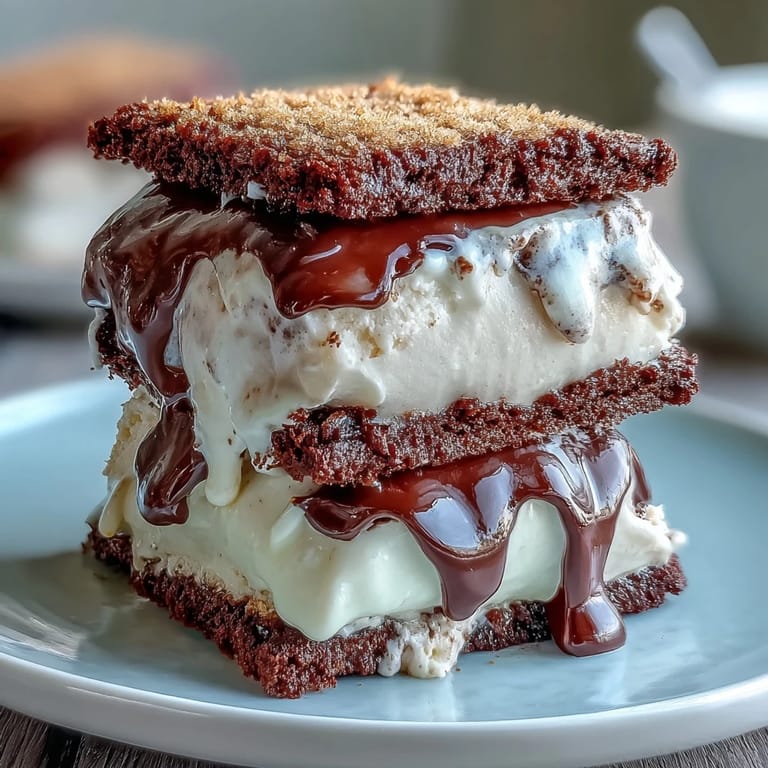
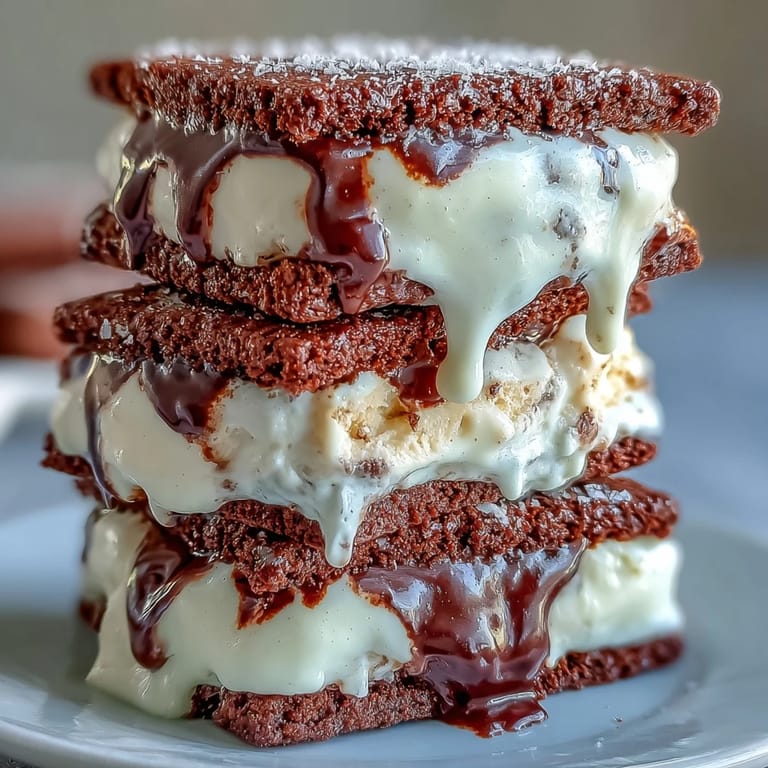
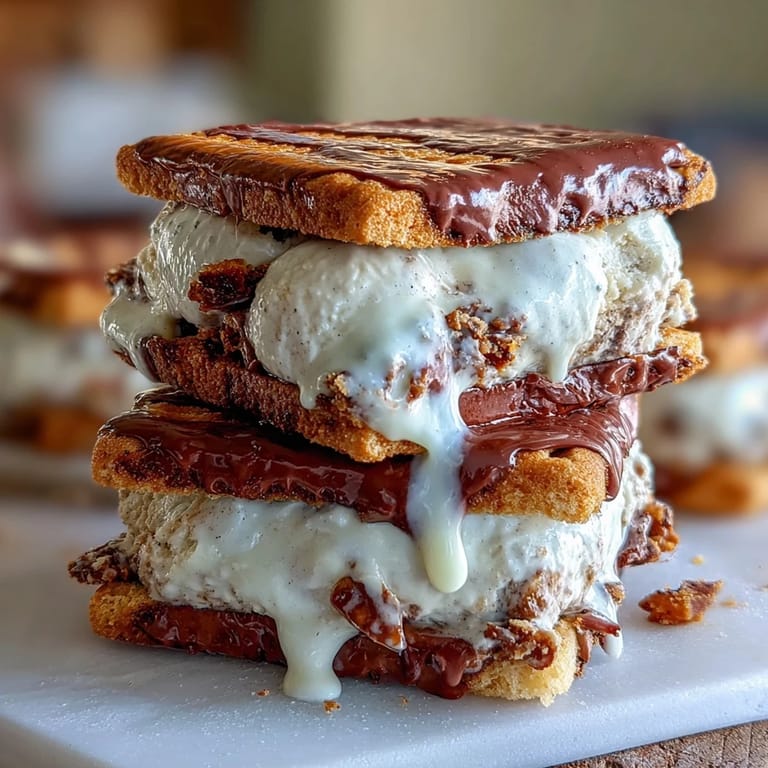
Save There's something magical about the moment when cold espresso-soaked chocolate meets creamy vanilla bean ice cream, and suddenly you're transported to your favorite coffee shop, except you're holding it in your hands like a treasure. I discovered this combination quite by accident one summer when I had leftover espresso cookies and a freshly churned batch of vanilla bean ice cream staring at me from opposite shelves of my freezer. The idea came to me fully formed: why not bridge these two worlds together? What emerged was something better than either component alone.
I'll never forget bringing these to a neighborhood gathering on the hottest day of the year, watching grown adults pause mid-conversation the moment they bit into one. My neighbor actually closed her eyes and didn't speak for a full five seconds, which felt like the highest compliment my kitchen could receive. That's when I realized these weren't just desserts—they were small moments of joy wrapped in parchment paper.
Ingredients
- Unsalted butter: Use real butter here; it creates that tender crumb structure and rich flavor that defines a proper espresso cookie.
- Brown sugar and granulated sugar: The combination gives you depth from molasses while granulated sugar ensures the cookies set properly.
- Large eggs: Room temperature eggs incorporate more smoothly and help bind everything together evenly.
- Vanilla extract: A good quality one makes a noticeable difference in the final taste.
- All-purpose flour: Don't sift unless you're feeling meticulous; I never do and the cookies turn out beautifully.
- Unsweetened cocoa powder: This isn't optional if you want that authentic chocolate-espresso flavor—it's the backbone of the cookie.
- Instant espresso powder: This is where the magic happens; it intensifies without making them taste bitter if you measure correctly.
- Baking soda: Trust the measurement; it helps the cookies spread just enough and rise slightly.
- Heavy cream and whole milk: Use full-fat versions for the silkiest ice cream texture.
- Vanilla bean: If you can splurge, real vanilla bean is worth it for the speckled appearance and floral complexity, though paste works wonderfully too.
- Granulated sugar: Dissolves completely in the warm milk base, creating a smooth custard foundation.
Tired of Takeout? 🥡
Get 10 meals you can make faster than delivery arrives. Seriously.
One email. No spam. Unsubscribe anytime.
Instructions
- Make the ice cream base first:
- In a medium saucepan, combine milk, sugar, vanilla bean seeds and pod (or paste), and salt. Heat over medium heat until you can see steam rising and the sugar has completely dissolved, but stop before it boils—you're looking for that delicate moment between warm and too hot. Remove from heat, discard the vanilla pod if using a whole bean, then stir in the heavy cream until it's all one beautiful mixture.
- Chill your custard with patience:
- This step feels like it's taking forever, but it's non-negotiable for silky ice cream. Get it into the refrigerator for at least 2 hours, or overnight if you're not in a rush. The cold base churns more smoothly and freezes with a better texture.
- Churn like your life depends on it:
- Follow your ice cream maker's instructions, but stay nearby—the moment it reaches soft-serve consistency is when you want to transfer it. Spread the churned ice cream into a parchment-lined 9x13-inch baking pan to about 1 inch thick and return it to the freezer for at least 2 hours until it's firm enough to cut.
- Cream the butter and sugars together:
- In a large bowl, beat the softened butter with both sugars until the mixture looks pale, fluffy, and almost mousse-like. This takes about 3 minutes with an electric mixer and creates the tender crumb you're after. Don't rush this—it's foundational.
- Beat in eggs and vanilla one at a time:
- Add eggs one at a time, letting each one fully incorporate before adding the next. This prevents the dough from looking curdled or separated. Add vanilla extract at the end and mix until just combined.
- Combine your dry ingredients separately:
- In a separate bowl, whisk together flour, cocoa powder, espresso powder, baking soda, and salt so everything is evenly distributed. This prevents pockets of espresso powder or baking soda from creating surprise flavor bursts in individual cookies.
- Bring wet and dry together gently:
- Gradually add the dry mixture to your creamed butter and eggs, mixing until just combined. Stop as soon as you don't see streaks of flour—overmixing develops gluten and toughens the cookies.
- Roll and cut with confidence:
- Divide dough in half and roll each portion between two sheets of parchment paper to about 1/4 inch thickness. Using a 3-inch round cutter, cut out 16 cookies total and place them on parchment-lined baking sheets. Don't gather and re-roll scraps too many times or the cookies become tough.
- Bake until the edges just set:
- Bake at 350°F for 10 to 12 minutes—pull them out when the edges look firm but the centers still have a tiny bit of give. They'll continue cooking slightly on the pan from residual heat and firm up as they cool. Cool completely on a wire rack, which usually takes 15 to 20 minutes.
- Cut the ice cream into rounds:
- Remove your frozen ice cream slab from the freezer and use the same 3-inch cutter to cut out 8 rounds. Work quickly so the ice cream doesn't soften too much, and if it starts melting, pop the rounds back in the freezer for 10 minutes.
- Assemble with a gentle touch:
- Place each ice cream round between two cookies and press together very gently—you're looking for them to stick, not squeeze the ice cream out the sides. Wrap each sandwich in parchment paper immediately and return them to the freezer.
- Final freeze for structural integrity:
- Let the assembled sandwiches freeze for at least 1 hour before serving. This time allows everything to set firmly so they hold together when you pick them up and don't start sliding apart mid-bite.
 Save
Save There's a particular joy in handing someone a homemade ice cream sandwich on a warm afternoon and watching their face light up with genuine surprise and delight. That's the moment when all the measuring and timing and careful assembly transforms into something that matters—not because it's perfect, but because it was made with intention.
The No-Ice-Cream-Maker Workaround
I've made these dozens of times without an ice cream maker and they still come out wonderfully. After your vanilla base has chilled for 2 hours, pour it into a shallow dish and freeze it. Every 30 minutes, stir it vigorously with a fork, scraping the frozen edges toward the center and breaking up any ice crystals. This takes patience and attention, but the texture that results is genuinely silky. It usually takes about 3 to 4 hours total to reach soft-serve consistency, so plan accordingly.
Customization and Edge Treatments
Before that final hour of freezing, you can roll the sandwich edges in mini chocolate chips, crushed espresso beans, finely chopped toasted nuts, or even a combination of all three. The frozen ice cream cream acts like glue and these additions create an extra layer of texture and flavor that elevates the whole thing. One time I rolled the edges in crushed salted pretzels and created something entirely unexpected and wonderful.
- For a mocha version, swap half the vanilla ice cream base for a chocolate or coffee-flavored ice cream instead.
- If you want less commitment, use store-bought vanilla bean ice cream and focus your energy on making exceptional espresso cookies.
- Let the assembled sandwiches sit at room temperature for 2 to 3 minutes before eating if you prefer them slightly softer and easier to bite into.
 Save
Save These ice cream sandwiches are summer in edible form, a little luxury that tastes like it took hours but honestly just requires care and timing. Make them once and you'll find yourself planning occasions around them.
Recipe FAQs
- → How do I make vanilla bean ice cream without an ice cream maker?
Freeze the chilled vanilla mixture in a shallow dish, stirring every 30 minutes until it thickens to a creamy consistency.
- → What gives the cookies their espresso flavor?
Instant espresso powder is mixed with cocoa and flour to infuse the cookies with a rich coffee aroma and taste.
- → Can I prepare the ice cream and cookies ahead of time?
Yes, both components can be made in advance. Freeze the ice cream slab and store baked cookies in an airtight container until assembly.
- → What is the best way to store assembled sandwiches?
Wrap each sandwich in parchment paper and freeze for at least an hour before serving to maintain shape and texture.
- → Are there any suggested toppings for extra texture?
Rolling sandwich edges in mini chocolate chips or crushed espresso beans adds a delightful crunch.