 Save
Save I discovered these pretzel bites at a game night where someone brought a golden-brown batch still warm from the oven, served alongside a pot of melted cheese that people couldn't stop dipping into. The combination was so simple yet so craveable that I went home determined to figure out how to make them myself. What struck me most wasn't the pretzel itself, but that moment watching everyone's hands reach for just one more, their fingers glistening with cheese, their focus completely diverted from the game. That's when I knew I had to master this recipe.
I made these for my neighbor's birthday potluck, and she texted me the next day asking for the recipe before I'd even left the driveway. What made it memorable wasn't just that they disappeared in twenty minutes—it was overhearing someone say, "These taste homemade," as if surprised that good things could come from someone's actual kitchen rather than a restaurant. That compliment stuck with me more than any five-star review ever could.
Ingredients
- All-purpose flour (3 1/4 cups): This is your foundation, and it needs to be measured correctly by spooning into the cup and leveling off, not scooping directly from the bag—the difference between light and dense bites is honestly that simple.
- Warm water (1 cup): The temperature matters more than you'd think; too hot kills the yeast, too cool and nothing rises, so use a thermometer if you're not confident with your instincts.
- Active dry yeast (2 1/4 tsp): Fresh yeast makes all the difference, so check that date on the packet and don't feel bad about replacing it if it's been sitting in your cabinet for a year.
- Granulated sugar (1 tbsp): This feeds the yeast and helps them wake up, creating those bubbles that make the dough light and pillowy.
- Salt (1 tsp): Beyond flavor, salt strengthens the gluten network and keeps the dough from spreading too much.
- Unsalted butter (2 tbsp melted for dough, plus 2 tbsp for the cheese dip): Use real butter—margarine won't give you that rich, slightly nutty taste that makes people ask if you went to culinary school.
- Baking soda (1/2 cup): This creates that signature pretzel crust and brown color; it's the secret step that makes homemade pretzels taste like the real deal.
- Water for boiling (8 cups): This needs to be a full pot because you're creating an alkaline bath that transforms the surface of the dough.
- Egg (1 beaten): The egg wash gives that gorgeous golden shine and helps the salt cling to the surface.
- Coarse sea salt: Don't skip this or use table salt; the larger crystals look beautiful and add a satisfying crunch.
- Sharp cheddar cheese (1 cup shredded): Sharp cheddar has more flavor punch than mild, so your dip tastes less like wallpaper paste and more like actual cheese.
- Mozzarella cheese (1/2 cup shredded): This melts smoothly and keeps the dip creamy without making it greasy.
- Whole milk (1 cup): Full-fat milk makes a richer dip; skim milk will make it thinner and less satisfying.
- All-purpose flour (2 tbsp for the roux): This thickens the cheese sauce without lumps, but you have to whisk constantly.
- Garlic powder (1/4 tsp) and smoked paprika (1/4 tsp): These give the dip depth and warmth—they're not about screaming flavor, just about making everything taste intentional.
Tired of Takeout? 🥡
Get 10 meals you can make faster than delivery arrives. Seriously.
One email. No spam. Unsubscribe anytime.
Instructions
- Wake Up Your Yeast:
- Pour your warm water into a bowl and stir in the sugar and yeast, then wait. You're listening for quiet—those tiny bubbles forming on top tell you everything's alive and ready to work. If after five minutes you see nothing but a flat surface, your water was probably too hot or your yeast has expired, and honestly it's better to know now than after you've kneaded for ten minutes.
- Build Your Dough:
- Stir in the melted butter and salt, then add flour a little at a time, mixing with your hands or a wooden spoon until it comes together into a shaggy mass. The dough should feel slightly sticky but not wet—if it's clinging to everything, add another tablespoon of flour and give it a minute to absorb.
- Knead Until Smooth:
- Flour your counter and knead the dough for five to seven minutes, pushing with the heel of your hand, folding it back over itself, turning it slightly, and repeating. You'll feel the texture change under your hands—it starts rough and gradually becomes elastic and smooth, almost silky.
- Let It Rise:
- Place the dough in a greased bowl, cover it with a damp towel, and find a warm spot in your kitchen—the top of the fridge, a turned-off oven with the light on, or even a corner that gets afternoon sun. In about an hour, it should roughly double in size, and when you poke it gently, the indentation should stay rather than bounce back immediately.
- Prepare Your Workspace:
- Preheat your oven to 425°F (220°C) and line a baking sheet with parchment paper. In a large pot, combine 8 cups of water and 1/2 cup of baking soda, then bring it to a rolling boil—the mixture will be slightly cloudy and smell almost medicinal, which is exactly what you want.
- Shape Your Bites:
- Turn your risen dough onto a lightly floured surface and divide it into six equal portions using a bench scraper or knife. Roll each piece into a rope about 18 inches long—it doesn't need to be perfect, just consistent—then use a knife to cut each rope into 1-inch pieces, aiming for roughly 24 to 30 pieces per rope.
- Take the Bath:
- Working in batches so you don't overcrowd, drop the dough pieces into the boiling baking soda water and let them sit for exactly 30 seconds—no more, or they'll get tough and soapy tasting. Use a slotted spoon to fish them out and transfer them to your prepared baking sheet.
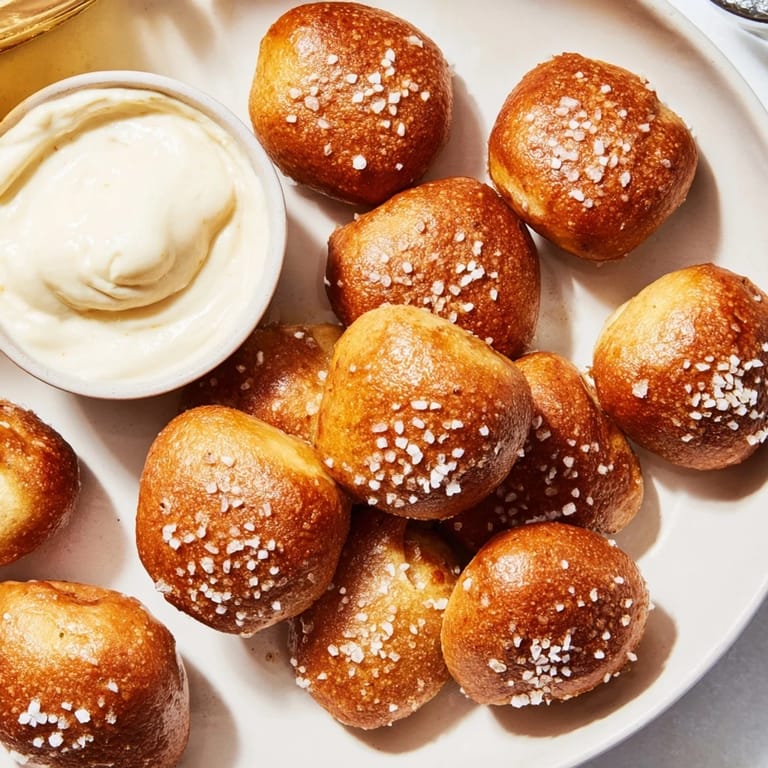
- Dress Them Up:
- Brush each warm piece with your beaten egg wash using a pastry brush, then sprinkle generously with coarse sea salt while the egg is still slightly tacky so it adheres. The egg wash is thin enough to coat everything without pooling, and the salt should look almost luxurious scattered across the tops.
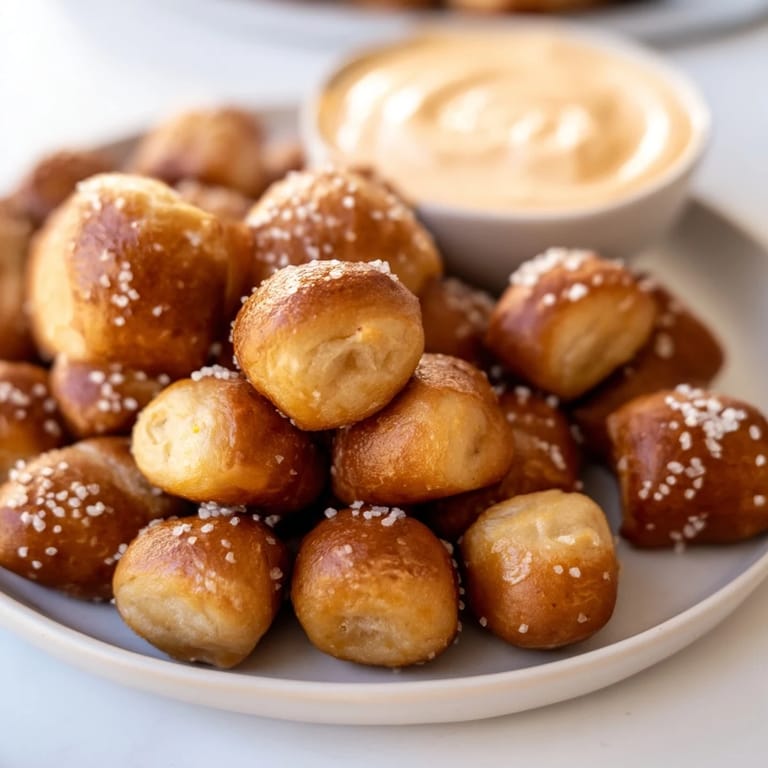
- Bake Until Golden:
- Slide the baking sheet into your preheated oven and bake for 12 to 15 minutes, until the tops are a deep golden brown. The bites should feel slightly firm to the touch but still have a tiny bit of give when you squeeze gently—overbaking turns them into little hockey pucks.
- Make Your Cheese Dip:
- In a saucepan over medium heat, melt 2 tablespoons of butter, then whisk in 2 tablespoons of flour and cook for one minute to create a paste, stirring constantly so it doesn't brown. Gradually pour in 1 cup of whole milk while whisking, then increase the heat slightly and keep whisking until the sauce thickens and coats the back of a spoon.
- Add the Cheese:
- Remove the saucepan from heat and stir in 1 cup of sharp cheddar and 1/2 cup of mozzarella, along with 1/4 teaspoon of garlic powder, 1/4 teaspoon of smoked paprika, and a pinch of salt and pepper. The cheese should melt immediately into a smooth, creamy dip—if you see any lumps, give it a vigorous whisk.
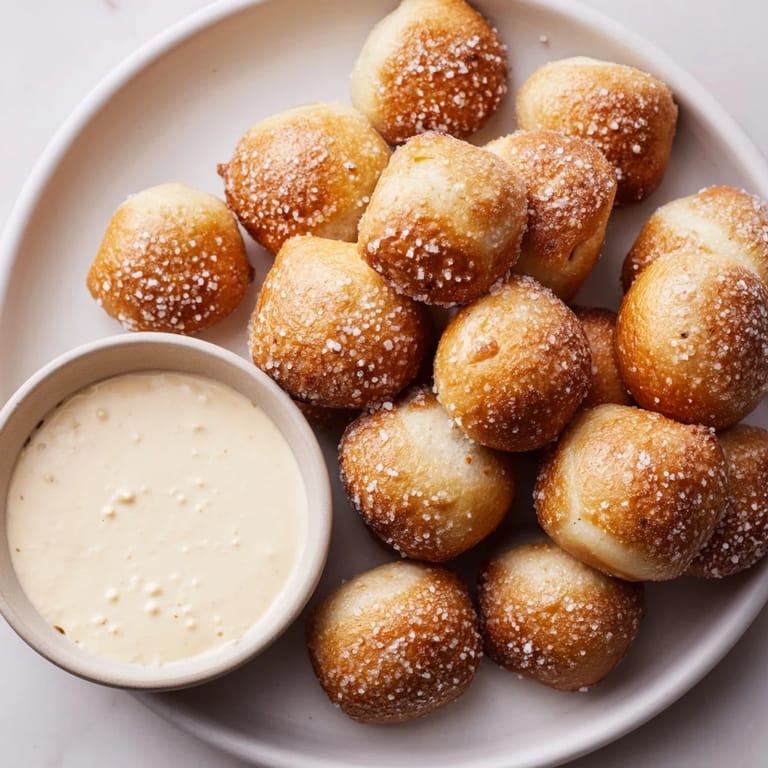
- Serve and Enjoy:
- Transfer the warm pretzel bites to a serving platter and pour the cheese dip into a bowl alongside or a small ramekin in the center. The best moment is right now, while everything's still warm and the contrast between the soft pretzel and the creamy cheese is at its peak.
 Save
Save I remember making these for the first time and calling my mom mid-process because I wasn't sure if my boiling water situation was supposed to smell quite so strongly of baking soda. She laughed and told me that was the exact moment I'd know it was working, and she was right—that alkaline smell meant the magic was happening. When I pulled them out of the oven and saw that perfect golden brown, I realized why my neighbor had asked for the recipe before even tasting one—because these look like they belong in a professional kitchen, not on your countertop.
Why the Baking Soda Bath Matters
Most people skip this step or try to substitute it with something simpler, and I understand why—it feels fussy and the smell is strange. But here's what I learned: the baking soda creates an alkaline environment that changes the pH of the dough's surface, allowing it to brown deeper and faster while creating that chewy, slightly dense texture that's distinctly pretzel. Without it, you just have baked bread with salt on top, which is fine but misses the whole point. The first time I made these without the bath as an experiment, they looked pale and tasted ordinary, and I never made that mistake again.
Timing and Temperature Confidence
One of the biggest hurdles I faced was trusting my judgment about temperatures and rise times. My kitchen is cooler than some, so my dough sometimes takes 75 minutes to double instead of exactly 60. Rather than stressing, I learned to look for the visual cue—the dough should roughly double and feel puffy when you poke it gently. Similarly, some ovens run hot and some run cool, so those 12 to 15 minutes of baking time is a range, not a target—look for deep golden brown, not a clock. Building this confidence means you stop feeling like you're following instructions and start feeling like you actually know what you're doing.
Troubleshooting and Storage
These bites are absolutely best served fresh and warm, but life doesn't always cooperate with that timeline. If you're making them ahead, you can reheat them in a 350°F (175°C) oven for about five minutes, and they'll come back to life almost as well as the first time. They don't freeze particularly well once baked—the texture gets mealy—but you can freeze the unbaked dough pieces on a sheet pan, then boil and bake them directly from frozen with just a minute or two added to the baking time. For the cheese dip, make it fresh if you can, but if you need to prepare it ahead, store it in an airtight container in the fridge and reheat gently over low heat, whisking in a splash of milk if it's gotten too thick.
- If your dough feels too sticky during kneading, resist adding too much flour—a slightly wet dough creates lighter bites.
- The egg wash can be thinned with a teaspoon of water if your brush is dragging rather than gliding.
- Have your baking sheet lined and ready before you start boiling, because boiled dough pieces can't wait around or they'll stick together.
 Save
Save There's something genuinely magical about serving food you've made with your own hands, especially when it's something as craveable as warm pretzel bites with creamy cheese dip. These aren't just snacks—they're a reason for people to gather around your kitchen and feel good about what you've created.
Recipe FAQs
- → How is the pretzel dough prepared for softness?
The dough is made by mixing flour, warm water, yeast, sugar, salt, and melted butter, then kneaded until elastic and allowed to rise until doubled, producing a soft, tender texture.
- → What is the role of baking soda in the process?
Boiling the dough pieces in a baking soda solution before baking helps develop a distinctive crust and deep brown color typical of pretzels.
- → Which cheeses are used in the dip?
The dip combines sharp cheddar and mozzarella cheeses, melted smoothly with butter, flour, and milk, enhanced with garlic powder and smoked paprika for depth of flavor.
- → Can the dip be customized with other cheeses?
Yes, variations like Gruyère or pepper jack can replace cheddar for different flavor profiles in the creamy dip.
- → How should the pretzel bites be stored or reheated?
Best enjoyed fresh, pretzel bites can be reheated in a 350°F oven for about 5 minutes to regain warmth and crispness.
- → What tools are needed for preparation?
Essential tools include a large mixing bowl, saucepan, slotted spoon, baking sheet, parchment paper, and a pastry brush for egg wash application.